How to replace Gear Stick Balll
When the Imp was
new one thing it was praised for was the
directness and slickness of the gear change
"like a big switch", however over
time the gear stick pivot 'gear ball' which
is made of hard rubber and steel wears away
and you are left with a sloppy feeling gear
stick. It also makes the gear change poor...
So what can be done? Well a replacement
'gear ball' made from nylon is available for
Imp Club Spares and other Imp Specialists
for about a £5 - but how do you fit
it.....
Tools and
Supplies Required
Hammer, 4.5mm Drill Bit, 6mm (1/4")
Drill Bit, Centre Punch,Pop Rivet Gun, 4x
4mm (5/32") pop rivets, Molygrease,
Drill
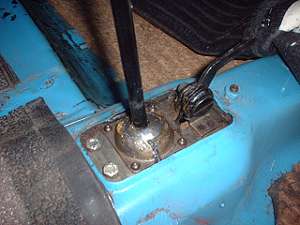
- Remove the carpet, rubber matting in
order to get access to the bottom of the
gear stick.
Remove the rubber gaiter fig 1
Fig 1
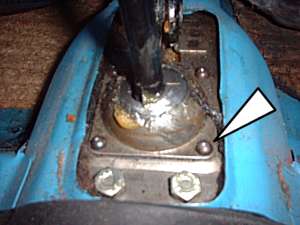
- Centre
punch each of the 4x rivets as arrowed
(fig 2), try to be accurate and punch
the middle of the rivet heads, it will
help lots with the next operation
Fig 2
- Using the
6mm (1/4") drill, drill off the just the
rivets heads (fig 3), DO NOT drill all
they way through! You are just
trying to remove the rivet heads, you
might need to chisel the remains of the
rivet head off after drilling..
Once you have done these use a punch to
knock the remains of the rivets though
the hole.
You can retrieve bits of rivets by
clambering under the car and once
removing the under tray, you can pull
the rubber boot of the bottom of the
gear stick assembly and pick out rivet
remains
Fig 3

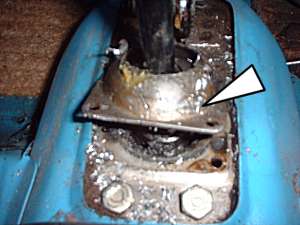
- Once the
rivets have been removed the part
arrowed(fig 4) will spring up.
Fig 4
- As will
this part which is under it!
Fig 5
- You can
pull the gear stick up out of the car.
and give it a good clean!
Fig 6
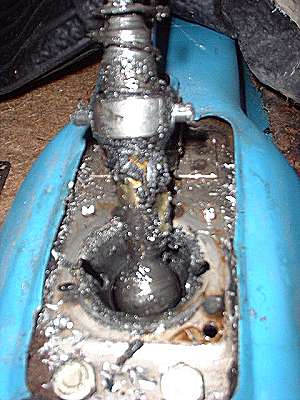
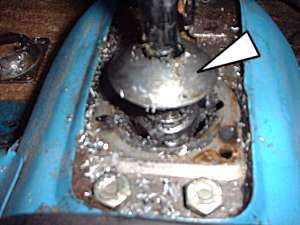
- Erm well
there should be a rubber ball thing at
the end of the arrow! (fig7) The might
explain why the gear stick was a bit
sloppy!
Fig 7
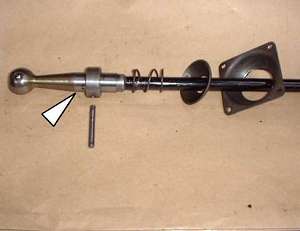
- Put the
gear stick in the vice and knock the pin
out using a punch. You do not need that
metal ring (fig 8 ), but it is worth
putting it in the bottom of your toolbox
- it may come in handy for something one
day!
Fig 8
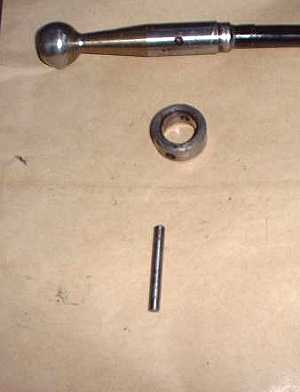
- This is
how the assembly should look once it is
finished (fig 9), but before the pin is
fitted.
Fig 9
- Use the
4.5mm dia drill (note this is slightly
smaller the existing hole in one side of
the new plastic gear ball and also the
pin).
You may have noticed that only one side
of the gear ball is drill, this is
normal. Assemble the new gear ball as
shown and line up the hole in the new
gear ball with the one in the gear
stick. Carefully (slowly) drill through
the assembly (fig 10) so as to drill
though the other side of the new gear
ball, it
is very important that you do this
carefully and also to use a drill bit
that is slightly smaller than the pin.
Fig 10
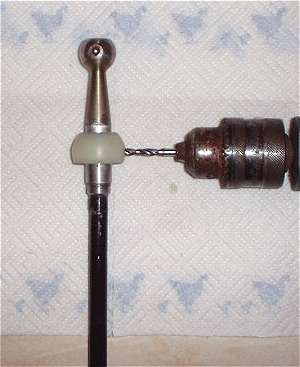
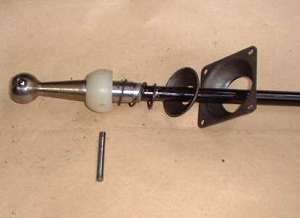
- Push the
pin through the new gear ball from the
side that had the existing hole towards
the hole that you have just drilled
I used a bit of loctite on the pin for
good measure. MAKE
sure the pin sticks out each side
evenly, and it is tight so it doesn't
fall out. (fig 11)
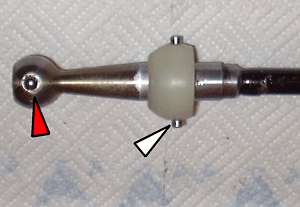
The red arrow points out the spring ball
which locates the gear stick in the gear
linkage. On this car this points towards
the engine. (the Haynes manual diagram
shows it being the other way! Put it
back the way you found it.)
Fig 11
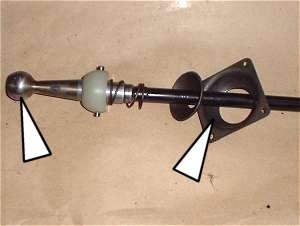
- Grease
these areas well (white arrows on fig
12) with some moly grease. The ball
should be self lubricating, put it won't
hurt to put a small smear of grease on
it.
Fig 12
- Before you refit the gear stick assembly to the
car, wrap a piece of rag around a
screwdriver and poke it down through the
car and clean out the part of the car
that the new ball pivots in AND down in
the gear linkage that the bottom of the
gear stick connects with.
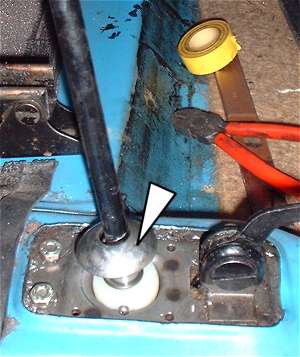
Refit the gear stick to the car,
remember which way that spring ball was
point as pointed out in point 11 above.
Make sure the pin is in it slots, pop a
bit of grease on the pin ends. The part
at the end of the arrow should have some
grease on it!
Fig 13
- You need
to push this bit down (fig 14), against
the spring.
Fig 14

- Whilst
holding it down slot in 4x 4mm (5/32")
pop rivets.Using a pop rivet gun (fig
15), fit this plate ensuring that plate
is pulled down properly If the rivets
snap before the plate is pulled down
properly then you need push down harder!
If the plate hasn't been pulled down
quite properly you can use a centre
punch to tighten them down by striking
the centre of the rivet heads.
Fig 15

Right that is it - you should now have a
slick positive feeling gear stick! Time for
a cuppa
